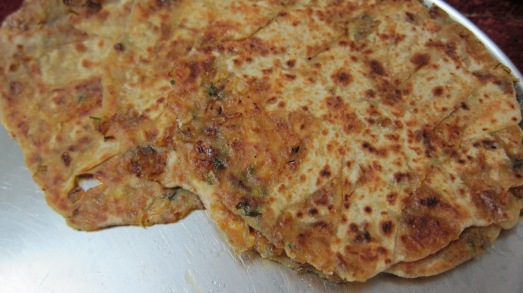
This is my third post only for Paranthas… You guys must have guessed by now that I am a big fan of paranthas… It is because as a child, paranthas was the only thing we used to have for breakfast… So paranthas, may it be aaloo, gobhi, onion, daal… any stuffing… was something that I used to have everyday till I was an adult..:) But I still love them so much… and can eat them everyday..:)
Usually I just stuff the parantha with finely chopped onions but yesterday thought of doing it differently so just fried the onions a bit… and what wonders that change did to my paranthas..:) You got to try it to know..:)
Preparation Time:- 10 mins | Cooking Time:– 5 mins per parantha | Serves:- 5-6 paranthas
INGREDIENTS:
- 2 cups whole Wheat Flour dough(Gehun ka aata guna hua)
- 4 medium Onions finely chopped
- Salt to taste
- 1/2 tea spoon Red Chilli Powder (Lal Mirch powder)
- 1/2 tea spoon Turmeric Powder (Haldi Powder)
- 2 table spoon fresh coriander leaves finely chopped (Dhaniya patti)
- 1 green chilly finely chopped (Hari Mirch) (optional)
- Ghee/oil to fry the parantha (I prefer ghee :))
- 2 tea spoon Ghee/oil
PREPARATION:
Heat 2 tea spoon of oil in a pan and add the onions to it. Allow the onions to fry till they are translucent.
Mix in the salt, turmeric powder and chilly powder, also the green chillies if using. Fry for 1 min. Remove from the stove and add the chopped coriander. Mix well. The filling is ready. Allow it to cool down so that it can be handled.
Once cooled down, we head on to make paranthas. Take some dough and after rubbing it with some dry flour, start making a chapati using a rolling pin. Once it becomes the size of a mini chapati, stop and take a big spoonful of the filling and place it in between.
Press the filling gently to remove air gaps and start folding the chapati inwards to seal the filling completely. Once done flatten it a bit by pressing it between the hand palms. (Don’t press too much since the filling may come out)
After rubbing with some dry flour, start rolling the parantha evenly.
Heat the tawa (non-stick can be used) and place the parantha on it. (Don’t use any oil yet.)
Once some blisters start appearing on the showing end then turn over the parantha. Now apply some ghee evenly on the showing end.Turn over the parantha, and apply some ghee on this end as well.
Start pressing the parantha using a flat spatula in order to cook properly. Once the parantha starts becoming crispy simmer the stove and dig in the spatula at several places on the parantha. This helps the parantha to get cooked from between also as the ghee seeps in.
Cook properly from both the sides by turning over at regular periods.
- Serve hot with Green Dhaniya chutney (Coriander Leaves Chutney) or tomato ketchup.
- Try it at tea time/breakfast with a hot cup of tea and Amul Butter or Homemade white butter.
- Try it for lunch or dinner with curd.
Tasty Cooking..!!
Sending this recipe to:
Favorite Recipes Event: Vegetarian Recipes.
Healthy Food for Healthy Kids-Combo Meal & Nithus Main Event


![Kids Combo Meal Logo_thumb[1]](https://cookcookandcook.wordpress.com/wp-content/uploads/2012/10/kids-combo-meal-logo_thumb11.jpg?w=300&h=84)

That is lovely!! Thanks for linking it to my combo meals event!!! Looking for more interesting recipes!!!
Sowmya
Ongoing Event – Healthy Foods for Healthy Kids – Combo Meals
Ongoing Event + Giveaway – CEDD – HONEY
LikeLike
Delicious onion paranthe, love it . My niece is fan of this. Thanks for linking with Favorite recipes event: Vegetarian recipes
LikeLike
Need a cup of tea with this.
http://realhomecookedfood.blogspot.com
LikeLike